swift原文链接 https://swiftui-lab.com/swiftui-animations-part4/
It’s been two years since I published Part 3 of this series of articles about Advanced SwiftUI Animations. I’m super excited about this year’s WWDC introduction of TimelineView and Canvas. It opens a whole new range of possibilities that I will try to lay out in this and the next part of the series.
自从我发布有关高级 SwiftUI 动画的本系列文章的第 3 部分以来,已经过去了两年。我对今年 WWDC 推出的 TimelineView 和 Canvas 感到非常兴奋。它开辟了一系列全新的可能性,我将尝试在本系列的这一部分和下一部分中阐述这些可能性。
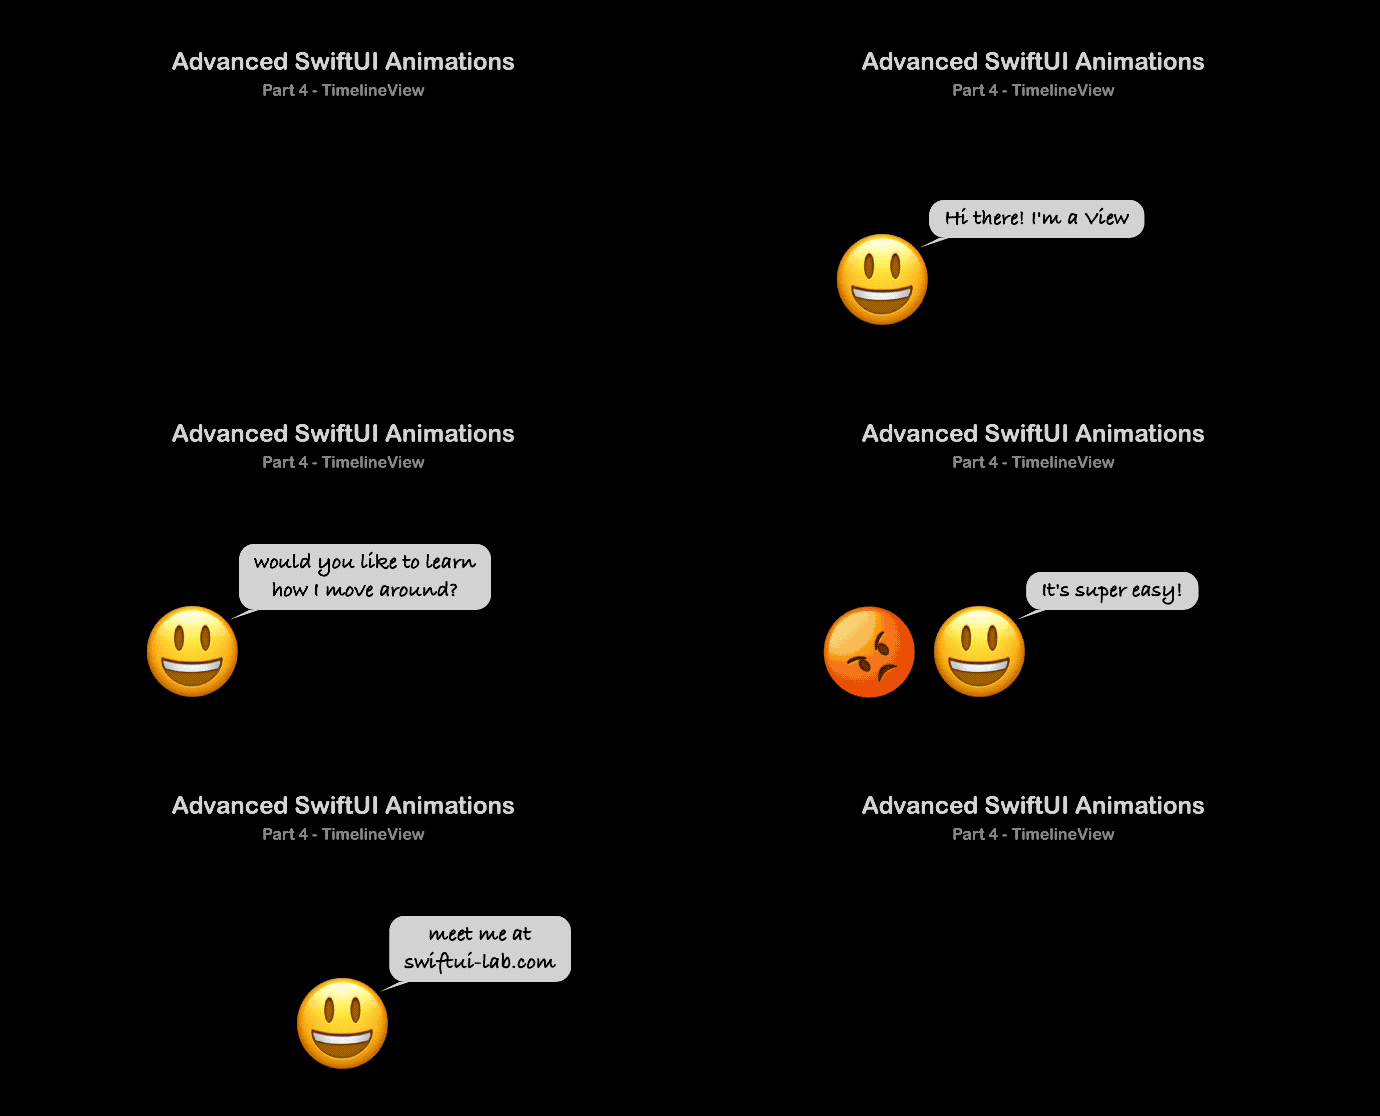
In this post, we will explore TimelineView in detail. We will start slow, with the most common uses. However, I think the biggest potential comes with combining TimelineView and the existing animations we already know. By being a little creative, among other things, this combo will let us finally do “keyframe-like” animations.
在这篇文章中,我们将详细探讨 TimelineView 。我们将从最常见的用途开始。然而,我认为最大的潜力来自于结合 TimelineView 和我们已经知道的现有动画。除其他外,通过一点创意,这个组合将让我们最终制作“类似关键帧”的动画。
In part 5, we will explore the Canvas view, and how great it is in combination with our new friend TimelineView.
在第 5 部分中,我们将探索 Canvas 视图,以及它与我们的新朋友 TimelineView 相结合是多么棒。
The animation shown above has been created using the techniques explained in this article. The full code of that animation is available in this gist.
上面显示的动画是使用本文中介绍的技术创建的。该动画的完整代码可在此要点中找到。
Components of a TimelineView TimelineView 的组件
TimelineView is a container view that re-evaluates its content with a frequency determined by the associated scheduler:
TimelineView 是一个容器视图,它以由关联的调度程序确定的频率重新评估其内容:
TimelineView(.periodic(from: .now, by: 0.5)) { timeline in

    ViewToEvaluatePeriodically()

}
The TimelineView receives a scheduler as a parameter. We will look at them in detail later, for now, the example uses a scheduler that fires every half a second.
接收 TimelineView 调度程序作为参数。我们稍后将详细介绍它们,现在,该示例使用每半秒触发一次的调度程序。
The other parameter is a content closure that receives a TimelineView.Context parameter that looks something like this:
另一个参数是内容闭包,它接收如下所示 TimelineView.Context 的参数:
struct Context {
    let cadence: Cadence
    let date: Date

    enum Cadence: Comparable {
        case live
        case seconds
        case minutes
    }
}
A Cadence is an enum we can use to make some decisions on what to show in our view. Possible values are: live, seconds, and minutes. Take this as a hint to avoid showing information irrelevant for the cadence. The typical example is to avoid showing milliseconds on a clock that has a scheduler with a seconds or minutes cadence.
A Cadence 是一个枚举,我们可以用它来决定在我们的视图中显示什么。可能的值为: live 、 seconds 和 minutes 。以此为提示,以避免显示与节奏无关的信息。典型的示例是避免在具有带有 seconds 或 minutes 节奏的调度程序的时钟上显示毫秒。
Note that the cadence is not something you can change, but something that reflects a device state. The documentation provides only one example. On watchOS, the cadence slows down when lowering the wrist. If you find other cases where the cadence changes, I would very much like to know. Please comment below.
请注意,节奏不是可以更改的,而是反映设备状态的。该文档仅提供了一个示例。在 watchOS 上,放下手腕时节奏会减慢。如果您发现节奏发生变化的其他情况,我非常想知道。请在下面发表评论。
Well, this all looks great, but there are many subtleties we should be aware of. Let’s start building our first TimelineView animation to see what these are…
好吧,这一切看起来都很棒,但我们应该注意许多微妙之处。让我们开始构建我们的第一个 TimelineView 动画,看看这些是什么......
Understanding How TimelineView Works 了解 TimelineView 的工作原理
Look at the following code. We have two emoji characters that change randomly. The only difference between the two is that one is written in the content closure, while the other has been put on a separate view for better readability.
请看下面的代码。我们有两个随机变化的表情符号字符。两者之间的唯一区别是,一个是写在内容闭包中,而另一个则放在单独的视图上以获得更好的可读性。
struct ManyFaces: View {
    static let emoji = ["?", "?", "?", "?", "?", "?", "?", "?", "?", "?", "?", "?", "?"]

    var body: some View {
        TimelineView(.periodic(from: .now, by: 0.2)) { timeline in

            HStack(spacing: 120) {

                let randomEmoji = ManyFaces.emoji.randomElement() ?? ""

                Text(randomEmoji)
                    .font(.largeTitle)
                    .scaleEffect(4.0)

                SubView()

            }
        }
    }

    struct SubView: View {
        var body: some View {
            let randomEmoji = ManyFaces.emoji.randomElement() ?? ""

            Text(randomEmoji)
                .font(.largeTitle)
                .scaleEffect(4.0)
        }
    }
}
Now, let’s see what happens when we run the code:
现在,让我们看看运行代码时会发生什么:
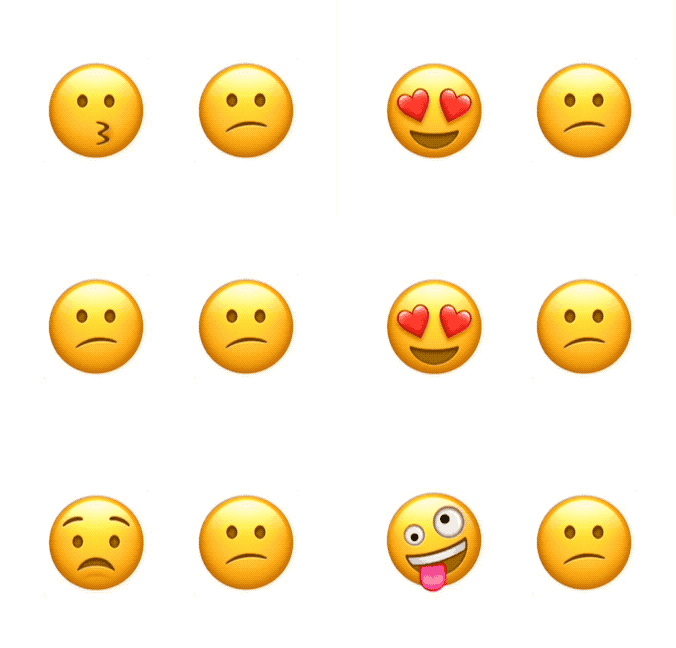
Shocked? Why does the left emoji change, but the other remains sad at all times? It turns out, the SubView is not receiving any changing parameters, which means it has no dependencies. SwiftUI has no reason to recompute the view’s body. A great talk from this year’s WWDC is Demystify SwiftUI. It explains view identify, lifetime and dependency. All these topics are very important to understand why the timeline behaves as it does.
惊呆?为什么左边的表情符号会改变,而另一个表情符号却一直很悲伤?事实证明,它没有收到任何更改的参数,这意味着它 SubView 没有依赖关系。SwiftUI 没有理由重新计算视图的正文。今年 WWDC 的一大亮点是揭开 SwiftUI 的神秘面纱。它解释了视图标识、生存期和依赖关系。所有这些主题对于理解为什么时间线的行为都非常重要。
To solve the problem, we change the SubView view to add a parameter that will change with every timeline update. Note that we do not need to use the parameter, it just has to be there. Nevertheless, we will see that this unused value will be quite useful later.
为了解决这个问题,我们更改视图 SubView 以添加一个参数,该参数将随着每次时间线更新而更改。请注意,我们不需要使用参数,它只需要在那里。尽管如此,我们将看到这个未使用的值稍后将非常有用。
struct SubView: View {
    let date: Date // just by declaring it, the view will now be recomputed apropriately.

    var body: some View {

        let randomEmoji = ManyFaces.emoji.randomElement() ?? ""

        Text(randomEmoji)
            .font(.largeTitle)
            .scaleEffect(4.0)
    }
}
Now the SubView is created like this:
现在是这样 SubView 创建的:
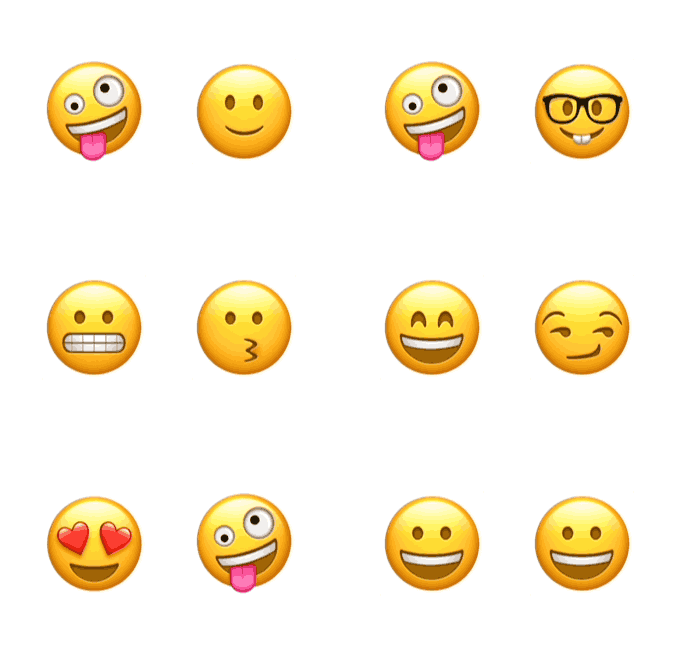
SubView(date: timeline.date)Finally, both our emoji can experience a whirlwind of emotions:
最后,我们的两个表情符号都可以体验到一阵情绪旋风:
Acting Upon a Timeline 根据时间表采取行动
Most examples about TimelineView (at the time of this writing), are usually about drawing clocks. That makes sense. The data provided by the timeline is, after all, a Date.
关于 TimelineView 的大多数示例(在撰写本文时)通常都是关于绘制时钟的。这是有道理的。毕竟,时间线提供的数据是一个 Date .
The easiest TimelineView clock ever:
有史以来最简单的TimelineView时钟:
TimelineView(.periodic(from: .now, by: 1.0)) { timeline in

    Text("\(timeline.date)")

}
Clocks may become a little more elaborate. For example, using an analog clock with shapes, or drawing the clock with the new Canvas view.
时钟可能会变得更加精致。例如,使用带有形状的模拟时钟,或使用新的 Canvas 视图绘制时钟。
However, TimelineView is here for more than just clocks. In many cases, we want our view to do something every time the timeline updates our view. The perfect place to put this code is the onChange(of:perform) closure.
然而, TimelineView 这里不仅仅是时钟。在许多情况下,我们希望我们的视图在每次时间线更新我们的视图时都执行某些操作。放置此代码的最佳位置是 onChange(of:perform) 闭包。
In the following example, we use this technique, to update our model every 3 seconds.
在以下示例中,我们使用此技术每 3 秒更新一次模型。

struct ExampleView: View {
    var body: some View {
        TimelineView(.periodic(from: .now, by: 3.0)) { timeline in
            QuipView(date: timeline.date)
        }
    }

    struct QuipView: View {
        @StateObject var quips = QuipDatabase()
        let date: Date

        var body: some View {
            Text("_\(quips.sentence)_")
                .onChange(of: date) { _ in
                    quips.advance()
                }
        }
    }
}

class QuipDatabase: ObservableObject {
    static var sentences = [
        "There are two types of people, those who can extrapolate from incomplete data",
        "After all is said and done, more is said than done.",
        "Haikus are easy. But sometimes they don't make sense. Refrigerator.",
        "Confidence is the feeling you have before you really understand the problem."
    ]

    @Published var sentence: String = QuipDatabase.sentences[0]

    var idx = 0

    func advance() {
        idx = (idx + 1) % QuipDatabase.sentences.count

        sentence = QuipDatabase.sentences[idx]
    }
}
It’s important to notice that for every timeline update, our QuipView is refreshed twice. That is, once when the timeline updates, and then again immediately after, because by calling quips.advance() we are causing the @Published value of quips.sentence to change and trigger the view update. This is perfectly fine, but it is something to be aware of, as it will become more important later on.
需要注意的是,每次时间线更新时,我们的 QuipView 时间线都会刷新两次。也就是说,在时间线更新时更新一次,然后在更新后立即再次更新,因为通过调用 quips.advance() ,我们会导致 @Published值 quips.sentence 发生变化并触发视图更新。这完全没问题,但这是需要注意的事情,因为它稍后会变得更加重要。
An important concept we take from this is that although the timeline may produce a certain number of updates, the content of the view will most likely update even more times.
我们从中得出的一个重要概念是,尽管时间线可能会产生一定数量的更新,但视图的内容很可能会更新更多次。
Combining TimelineView with Traditional Animations 将 TimelineView 与传统动画相结合
The new TimelineView brings a lot of new opportunities. Combining it with Canvas, as we will see in a future post, is a great addition. But that puts the load of writing all the code for each frame of the animation on us. The technique I am going to expose in this section, uses the animations we already know and love to animate views from one timeline update to the next. This will finally let us create our own keyframe-like animations purely in SwiftUI.
新带来了很多新 TimelineView 的机会。正如我们将在以后的帖子中看到的那样,将其与 Canvas 结合使用是一个很好的补充。但是,这给我们带来了为动画的每一帧编写所有代码的负担。我将在本节中介绍的技术,使用我们已经知道和喜欢的动画来动画化从一个时间轴更新到下一个时间轴更新的视图。这最终将允许我们纯粹在 SwiftUI 中创建我们自己的类似关键帧的动画。
But let’s begin slow, with our little project: the metronome shown below. Play the video with the volume up, to appreciate how the beat sound is synchronized with the pendulum. Also, as metronomes do, a bell sounds every few beats:
但是,让我们慢慢开始,从我们的小项目开始:如下所示的节拍器。在提高音量的情况下播放视频,以欣赏节拍声音如何与钟摆同步。此外,就像节拍器一样,铃声每隔几拍就会响起:
First, let’s see what our timeline looks like:
首先,让我们看看我们的时间线是什么样子的:
struct Metronome: View {
    let bpm: Double = 60 // beats per minute

    var body: some View {
        TimelineView(.periodic(from: .now, by: 60 / bpm)) { timeline in
            MetronomeBack()
                .overlay(MetronomePendulum(bpm: bpm, date: timeline.date))
                .overlay(MetronomeFront(), alignment: .bottom)
        }
    }
}
Metronomes speeds are usually specified in bpm (beats per minute). The example uses a periodic scheduler, that repeats every 60/bpm seconds. For our case, bpm = 60, so the scheduler fires every 1 second. That is, 60 times per minute.
节拍器速度通常以 bpm(每分钟节拍数)为单位指定。该示例使用定期调度程序,该调度程序每 60/bpm 秒重复一次。对于我们的例子, bpm = 60 调度程序每 1 秒触发一次。也就是说,每分钟60次。
The Metronome view is composed of three layers: The MetronomeBack, MetronomePendulum, and MetronomeFront. They are overlaid in that order. The only view that will have to refresh with every timeline update, will be the MetronomePendulum, which swings from side to side. The other views won’t refresh, because they have no dependencies.
视图 Metronome 由三层组成:、 MetronomeBack 和 MetronomePendulum MetronomeFront 。它们按该顺序叠加。每次时间线更新时必须刷新的唯一视图是 MetronomePendulum ,它左右摆动。其他视图不会刷新,因为它们没有依赖项。
The code for MetronomeBack and MetronomeFront is very simple, they use a custom shape called RoundedTrapezoid. To avoid making this page too long, the code for the custom shape is in this gist.
MetronomeBack 和 MetronomeFront 的代码非常简单,他们使用一个名为 RoundedTrapezoid .为了避免使此页面太长,自定义形状的代码位于此要点中。
struct MetronomeBack: View {
    let c1 = Color(red: 0, green: 0.3, blue: 0.5, opacity: 1)
    let c2 = Color(red: 0, green: 0.46, blue: 0.73, opacity: 1)

    var body: some View {
        let gradient = LinearGradient(colors: [c1, c2],
                                      startPoint: .topLeading,
                                      endPoint: .bottomTrailing)

        RoundedTrapezoid(pct: 0.5, cornerSizes: [CGSize(width: 15, height: 15)])
            .foregroundStyle(gradient)
            .frame(width: 200, height: 350)
    }
}

struct MetronomeFront: View {
    var body: some View {
        RoundedTrapezoid(pct: 0.85, cornerSizes: [.zero, CGSize(width: 10, height: 10)])
            .foregroundStyle(Color(red: 0, green: 0.46, blue: 0.73, opacity: 1))
            .frame(width: 180, height: 100).padding(10)
    }
}
The MetronomePendulum view, however, is where things start to get interesting:
然而, MetronomePendulum 这个观点是事情开始变得有趣的地方:
struct MetronomePendulum: View {
    @State var pendulumOnLeft: Bool = false
    @State var bellCounter = 0 // sound bell every 4 beats

    let bpm: Double
    let date: Date

    var body: some View {
        Pendulum(angle: pendulumOnLeft ? -30 : 30)
            .animation(.easeInOut(duration: 60 / bpm), value: pendulumOnLeft)
            .onChange(of: date) { _ in beat() }
            .onAppear { beat() }
    }

    func beat() {
        pendulumOnLeft.toggle() // triggers the animation
        bellCounter = (bellCounter + 1) % 4 // keeps count of beats, to sound bell every 4th

        // sound bell or beat?
        if bellCounter == 0 {
            bellSound?.play()
        } else {
            beatSound?.play()
        }
    }

    struct Pendulum: View {
        let angle: Double

        var body: some View {
            return Capsule()
                .fill(.red)
                .frame(width: 10, height: 320)
                .overlay(weight)
                .rotationEffect(Angle.degrees(angle), anchor: .bottom)
        }

        var weight: some View {
            RoundedRectangle(cornerRadius: 10)
                .fill(.orange)
                .frame(width: 35, height: 35)
                .padding(.bottom, 200)
        }
    }
}
Our view needs to keep track of where we are in the animation. I will call this, the animation phase. Since we need to track these phases, we will use @State variables:
我们的视图需要跟踪我们在动画中的位置。我称之为动画阶段。由于我们需要跟踪这些阶段,我们将使用@State变量:
pendulumOnLeft: keeps track of which way the pendulum is swinging.pendulumOnLeft:跟踪钟摆的摆动方向。bellCounter: it keeps count of the number of beats, to determine if a beat or a bell should be heard.bellCounter:它记录节拍数,以确定是否应该听到节拍或铃声。
The example uses the .animation(_:value:) modifier. This version of the modifier, applies an animation when the specified value changes. Note that it is also possible to use an explicit animation. Instead of calling .animation(), simply toggle the pendulumOnLeft variable inside a withAnimation closure.
该示例使用 .animation(_:value:) 修饰符。此版本的修改器在指定值更改时应用动画。请注意,也可以使用显式动画。无需调用 .animation() ,只需在 withAnimation 闭包内切换 pendulumOnLeft 变量即可。
To make our view advance through the animation phases, we monitor changes in date, using the onChange(of:perform) modifier, as we did with the previous quip example.
为了使我们的视图在动画阶段前进,我们使用 onChange(of:perform) 修饰符监视 中 date 的变化,就像我们在前面的 quip 示例中所做的那样。
In addition to advancing the animation phase every time the date value changes, we also do it in the onAppear closure. Otherwise, there would be a pause at the beginning.
除了在每次日期值更改时推进动画阶段外,我们还在 onAppear 闭包中执行此操作。否则,一开始就会停顿。
The final piece of code, non-SwiftUI related, is creating the NSSound instances. To avoid overcomplicating the example, I just created a couple of global variables:
最后一段代码(与 SwiftUI 无关)是创建 NSSound 实例。为了避免使示例过于复杂,我只创建了几个全局变量:
let bellSound: NSSound? = {
    guard let url = Bundle.main.url(forResource: "bell", withExtension: "mp3") else { return nil }
    return NSSound(contentsOf: url, byReference: true)
}()

let beatSound: NSSound? = {
    guard let url = Bundle.main.url(forResource: "beat", withExtension: "mp3") else { return nil }
    return NSSound(contentsOf: url, byReference: true)
}()
If you need sound files, there is a large database available at: https://freesound.org/
如果您需要声音文件,可以在以下位置找到大型数据库: freesound.org/
The ones in the example are:
示例中的是:
bell sound: metronome_pling under license CC BY 3.0 (m1rk0)
铃声: metronome_pling 在许可下 CC BY 3.0 (m1rk0)beat sound: metronome.wav under license CC0 1.0 (Druminfected)
节拍声音:节拍器.WAV 在许可证CC0 1.0下(鼓感染)
The TimelineScheduler
As we’ve seen already, a TimelineView needs a TimelineScheduler to determine when to update its contents. SwiftUI provides some predefined schedulers, like the ones we used. However, we can also create our own custom scheduler. I will elaborate more on that in the next section. But let’s start with the pre-existing ones.
正如我们已经看到的,a 需要 a TimelineView TimelineScheduler 来确定何时更新其内容。SwiftUI 提供了一些预定义的调度程序,就像我们使用的调度程序一样。但是,我们也可以创建自己的自定义调度程序。我将在下一节中对此进行更多阐述。但是,让我们从预先存在的开始。
A timeline scheduler is basically a struct that adopts the TimelineScheduler protocol. The existing types are:
时间线调度器基本上是采用协议的 TimelineScheduler 结构体。现有类型包括:
AnimationTimelineSchedule: Updates as fast as possible, giving you the chance to draw each frame of the animation. It has parameters that let you limit the frequency of updates, and pause the updates. This one will be very useful when combiningTimelineViewwith the newCanvasview.AnimationTimelineSchedule:尽可能快地更新,让您有机会绘制动画的每一帧。它具有允许您限制更新频率和暂停更新的参数。当与新Canvas视图结合使用TimelineView时,这将非常有用。EveryMinuteTimelineSchedule: As the name implies, it updates every minute, at the start of the minute.EveryMinuteTimelineSchedule:顾名思义,它每分钟更新一次,在一分钟开始时。ExplicitTimelineSchedule: You may provide an array with all the times you want the timeline to update.ExplicitTimelineSchedule:您可以提供一个数组,其中包含您希望时间线更新的所有时间。PeriodicTimelineSchedule: You may provide a start time and a frequency at which updates occur.PeriodicTimelineSchedule:您可以提供更新的开始时间和频率。
Although you could create a timeline in this fashion:
尽管您可以以这种方式创建时间线:
Timeline(EveryMinuteTimelineSchedule()) { timeline in
	...
}
Since Swift 5.5 and the introduction of SE-0299, we now have support for enum-like syntax. This makes the code more readable and improves autocompletion. It is recommended that we use this syntax instead:
自 Swift 5.5 和 SE-0299 推出以来,我们现在支持类似枚举的语法。这使代码更具可读性并改进了自动完成。建议我们改用以下语法:
TimelineView(.everyMinute) { timeline in
	...
}
_Note: You may have heard, but this has also been introduced with styles this year. And better yet, for styles, as long as you are using Swift 5.5, you may back-deploy it with previous versions.
注意:您可能听说过,但今年的款式也引入了此功能。更好的是,对于样式,只要你使用的是 Swift 5.5,你就可以使用以前的版本进行反向部署。_
For each of the existing schedulers, there may be more than one enum-like option. For example, these two lines create a scheduler of the AnimationTimelineSchedule type:
对于每个现有的调度程序,可能有多个类似枚举的选项。例如,以下两行创建 AnimationTimelineSchedule 类型的计划程序:
TimelineView(.animation) { ... }

TimelineView(.animation(minimumInterval: 0.3, paused: false)) { ... }
And you may even create your own (do not forget the static keyword!):
您甚至可以创建自己的(不要忘记静态关键字!)
extension TimelineSchedule where Self == PeriodicTimelineSchedule {
    static var everyFiveSeconds: PeriodicTimelineSchedule {
        get { .init(from: .now, by: 5.0) }
    }
}

struct ContentView: View {
    var body: some View {
        TimelineView(.everyFiveSeconds) { timeline in
            ...
        }
    }
}
Custom TimelineScheduler 自定义 TimelineScheduler
If none of the existing schedulers fit your needs, you may create your own. Consider the following animation:
如果现有的调度程序都不符合您的需求,您可以创建自己的调度程序。请考虑以下动画:
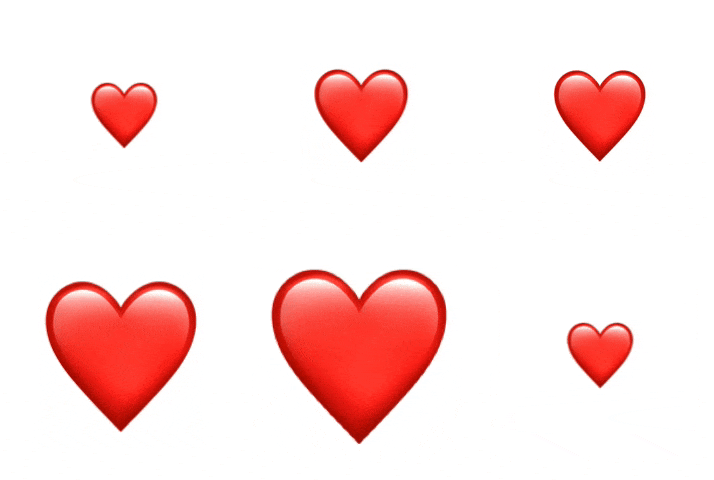
In this animation, we have a heart emoji that changes its scale, at irregular intervals and irregular amplitudes:
在这个动画中,我们有一个心形表情符号,它以不规则的间隔和不规则的幅度改变它的比例:
It starts with a scale of 1.0, 0.2 seconds later grows to 1.6, 0.2 seconds later, grows to 2.0, then shrinks back to 1.0 and stays there for 0.4 seconds, before starting all over. In other words:
它从 1.0 的刻度开始,0.2 秒后增长到 1.6,0.2 秒后增长到 2.0,然后缩小到 1.0 并在那里停留 0.4 秒,然后重新开始。换言之:
Scale changes: 1.0 → 1.6 → 2.0 → start again
比例变化:1.0 → 1.6 → 2.0 →重新开始
Time between changes: 0.2 → 0.2 → 0.4 → start again
更改间隔时间:0.2 → 0.2 → 0.4 →重新开始
We could create a HeartTimelineSchedule that updates exactly as the heart requires. But in the name of reusability, let’s do something more generic that can be reused in the future.
我们可以创建一个 HeartTimelineSchedule 完全按照心脏需要更新的。但是在可重用性的名义下,让我们做一些更通用的东西,将来可以重用。
Our new scheduler will be called: CyclicTimelineSchedule and will receive an array of time offsets. Each offset value will be relative to the previous value in the array. When the scheduler has exhausted the offsets, it will cycle back to the beginning of the array and start all over.
我们的新调度器将被调用: CyclicTimelineSchedule ,并将接收一个时间偏移量数组。每个偏移值将相对于数组中的前一个值。当调度程序用尽偏移量时,它将循环回数组的开头并重新开始。
struct CyclicTimelineSchedule: TimelineSchedule {
    let timeOffsets: [TimeInterval]

    func entries(from startDate: Date, mode: TimelineScheduleMode) -> Entries {
        Entries(last: startDate, offsets: timeOffsets)
    }

    struct Entries: Sequence, IteratorProtocol {
        var last: Date
        let offsets: [TimeInterval]

        var idx: Int = -1

        mutating func next() -> Date? {
            idx = (idx + 1) % offsets.count

            last = last.addingTimeInterval(offsets[idx])

            return last
        }
    }
}
There are a couple of requirements to implement a TimelineSchedule:
实现 TimelineSchedule 有几个要求:
Provide the
entries(from:mode:)function.
提供entries(from:mode:)函数。Our
Entriestype must conform toSequencewhereEntries.Element == Date
我们的Entries类型必须符合SequenceEntries.Element == Date
There are several ways in which you can conform to Sequence. This example implements IteratorProtocol and declares conformance to both Sequence and IteratorProtocol. You can read more about Sequence conformance here.
您可以通过多种方式符合 Sequence .此示例实现 IteratorProtocol 并声明符合 Sequence 和 IteratorProtocol 。您可以在此处阅读有关序列一致性的更多信息。
For Entries to implement IteratorProtocol, we must write the next() function, which produces the dates in the timeline. Our scheduler remembers the last date and adds the appropriate offset. When no more offsets remain, it cycles back to the first in the array.
为了 Entries 实现 IteratorProtocol ,我们必须编写函数 next() ,该函数在时间轴中生成日期。我们的调度程序会记住最后日期并添加适当的偏移量。当没有更多的偏移量时,它会循环回数组中的第一个偏移量。
Finally, the icing on the cake for our scheduler is to create an enum-like initializer:
最后,为我们的调度器锦上添花的是创建一个类似枚举的初始值设定项:
extension TimelineSchedule where Self == CyclicTimelineSchedule {
    static func cyclic(timeOffsets: [TimeInterval]) -> CyclicTimelineSchedule {
            .init(timeOffsets: timeOffsets)
    }
}
Now that we have our TimelineSchedue type ready, let’s put some life into our heart:
现在我们已经准备好了 TimelineSchedue 我们的类型,让我们把一些生命放进我们的心里:
struct BeatingHeart: View {
    var body: some View {
        TimelineView(.cyclic(timeOffsets: [0.2, 0.2, 0.4])) { timeline in
            Heart(date: timeline.date)
        }
    }
}

struct Heart: View {
    @State private var phase = 0
    let scales: [CGFloat] = [1.0, 1.6, 2.0]

    let date: Date

    var body: some View {
        HStack {
            Text("❤️")
                .font(.largeTitle)
                .scaleEffect(scales[phase])
                .animation(.spring(response: 0.10,
                                   dampingFraction: 0.24,
                                   blendDuration: 0.2),
                           value: phase)
                .onChange(of: date) { _ in
                    advanceAnimationPhase()
                }
                .onAppear {
                    advanceAnimationPhase()
                }

        }
    }

    func advanceAnimationPhase() {
        phase = (phase + 1) % scales.count
    }
}
You should be familiar with this pattern now, it is the same one we used with the metronome. Advance the animation with onChange and onAppear, use @State variables to keep track of the animation, and set an animation that will transition our view from one timeline update, to the next. In this case, we employ a .spring animation, giving it a nice shake effect.
你现在应该熟悉这个模式了,它与我们在节拍器上使用的模式相同。使用 和 onAppear 推进动画,使用 onChange @State 变量来跟踪动画,并设置一个动画,将我们的视图从一个时间轴更新过渡到下一个时间轴更新。在本例中,我们使用动画 .spring ,赋予它一个很好的摇晃效果。
KeyFrame Animations 关键帧动画
The heart and metronome examples are, in a way, keyframe animations. We defined several key points in the whole animation, where we change the parameters of our view, and let SwiftUI animate the transition between these points. The following example will try to generalize that idea, and make it more evident. Meet our new project friend, the jumping guy:
在某种程度上,心形和节拍器示例是关键帧动画。我们在整个动画中定义了几个关键点,在这些关键点上,我们更改了视图的参数,并让 SwiftUI 对这些点之间的过渡进行动画处理。下面的示例将尝试概括该想法,并使其更加明显。认识我们的新项目朋友,跳跃的家伙:

If you observe the animation carefully, you will notice that this emoji character has many of its parameters changed at different points in time. These parameters are: y-offset, rotation and y-scale. And also important, the different segments of the animation, have different animation types (linear, easeIn and easeOut). Since these are the parameters we change, it is a good idea to put them together in an array. Let’s begin:
如果你仔细观察动画,你会发现这个表情符号角色的许多参数在不同的时间点发生了变化。这些参数是:y 偏移量、旋转和 y 刻度。同样重要的是,动画的不同部分具有不同的动画类型( linear 和 easeIn easeOut )。由于这些是我们更改的参数,因此将它们放在一个数组中是个好主意。让我们开始吧:
struct KeyFrame {
    let offset: TimeInterval
    let rotation: Double
    let yScale: Double
    let y: CGFloat
    let animation: Animation?
}

let keyframes = [
    // Initial state, will be used once. Its offset is useless and will be ignored
    KeyFrame(offset: 0.0, rotation: 0, yScale: 1.0, y: 0, animation: nil),

    // Animation keyframes
    KeyFrame(offset: 0.2, rotation:   0, yScale: 0.5, y:  20, animation: .linear(duration: 0.2)),
    KeyFrame(offset: 0.4, rotation:   0, yScale: 1.0, y: -20, animation: .linear(duration: 0.4)),
    KeyFrame(offset: 0.5, rotation: 360, yScale: 1.0, y: -80, animation: .easeOut(duration: 0.5)),
    KeyFrame(offset: 0.4, rotation: 360, yScale: 1.0, y: -20, animation: .easeIn(duration: 0.4)),
    KeyFrame(offset: 0.2, rotation: 360, yScale: 0.5, y:  20, animation: .easeOut(duration: 0.2)),
    KeyFrame(offset: 0.4, rotation: 360, yScale: 1.0, y: -20, animation: .linear(duration: 0.4)),
    KeyFrame(offset: 0.5, rotation:   0, yScale: 1.0, y: -80, animation: .easeOut(duration: 0.5)),
    KeyFrame(offset: 0.4, rotation:   0, yScale: 1.0, y: -20, animation: .easeIn(duration: 0.4)),
]
It is important to know that when TimelineView appears, it will draw our view, even if there are no scheduled updates, or if they are in the future. When the TimelineView appears, it needs to show something so it does draw our view. We are going to use the first keyframe for the state of our view at that point, but when we loop, that frame will be ignored. This is an implementation decision, you may need or want to do it differently.
重要的是要知道,当出现时 TimelineView ,即使没有计划的更新,或者将来有更新,它也会吸引我们的视图。当出现 TimelineView 时,它需要显示一些东西,这样它才能吸引我们的视图。我们将使用第一个关键帧来表示此时的视图状态,但是当我们循环时,该帧将被忽略。这是一个实施决策,您可能需要或希望以不同的方式进行。
Now, let’s look at our timeline:
现在,让我们看一下我们的时间线:
struct JumpingEmoji: View {
    // Use all offset, minus the first
    let offsets = Array(keyframes.map { $0.offset }.dropFirst())

    var body: some View {
        TimelineView(.cyclic(timeOffsets: offsets)) { timeline in
            HappyEmoji(date: timeline.date)
        }
    }
}
We are already benefiting from the work we did on the previous example, and reusing the CyclicTimelineScheduler. As mentioned, we do not need the offset of the first keyframe, so we discard it.
我们已经从上一个示例中所做的工作中受益,并重用了 CyclicTimelineScheduler .如前所述,我们不需要第一个关键帧的偏移量,因此我们丢弃它。
Now the fun part:
现在是有趣的部分:
struct HappyEmoji: View {
    // current keyframe number
    @State var idx: Int = 0

    // timeline update
    let date: Date

    var body: some View {
        Text("?")
            .font(.largeTitle)
            .scaleEffect(4.0)
            .modifier(Effects(keyframe: keyframes[idx]))
            .animation(keyframes[idx].animation, value: idx)
            .onChange(of: date) { _ in advanceKeyFrame() }
            .onAppear { advanceKeyFrame()}
    }

    func advanceKeyFrame() {
        // advance to next keyframe
        idx = (idx + 1) % keyframes.count

        // skip first frame for animation, which we
        // only used as the initial state.
        if idx == 0 { idx = 1 }
    }

    struct Effects: ViewModifier {
        let keyframe: KeyFrame

        func body(content: Content) -> some View {
            content
                .scaleEffect(CGSize(width: 1.0, height: keyframe.yScale))
                .rotationEffect(Angle(degrees: keyframe.rotation))
                .offset(y: keyframe.y)
        }
    }
}
For better readability, I put all the changing parameters inside a modifier, called Effects. As you can see, it is again the same pattern: use onChange and onAppear to advance our animation, and add an animation for each keyframe segment. Nothing new there.
为了提高可读性,我将所有更改的参数放在一个名为 Effects .正如你所看到的,它又是相同的模式:使用 onChange 和 onAppear 推进我们的动画,并为每个关键帧片段添加一个动画。那里没什么新鲜事。
Don’t! It’s a Trap! 不要!这是一个陷阱!
In your path to the TimelineView discovery, you may encounter this error:
在 TimelineView 发现路径中,可能会遇到以下错误:
Action Tried to Update Multiple Times Per FrameLet’s see an example that generates this message:
让我们看一个生成此消息的示例:
struct ExampleView: View {
    @State private var flag = false

    var body: some View {

        TimelineView(.periodic(from: .now, by: 2.0)) { timeline in

            Text("Hello")
                .foregroundStyle(flag ? .red : .blue)
                .onChange(of: timeline.date) { (date: Date) in
                    flag.toggle()
                }

        }
    }
}
The code looks harmless, and it is supposed to change the text color every two seconds, alternating between red and blue. So what could be going on? Just pause for a second and see if you can spot the reason behind it.
代码看起来无害,它应该每两秒更改一次文本颜色,在红色和蓝色之间交替。那么会发生什么呢?停顿一秒钟,看看你是否能找到背后的原因。
We are not dealing with a bug. The problem is, in fact, predictable.
我们不是在处理一个错误。事实上,这个问题是可以预见的。
It is important to remember that the first update of a timeline is when it appears for the first time, then it follows the scheduler rules to trigger the following updates. So even if our scheduler produces no update, the TimelineView content is generated at least once.
请务必记住,时间线的第一次更新是它第一次出现时,然后它按照调度程序规则触发以下更新。因此,即使我们的调度程序不生成任何更新,TimelineView 内容也至少生成一次。
In this specific example, we monitor for changes in the timeline.date value, and when it does change, we toggle the flag variable, which produces the color change.
在这个特定示例中,我们监视 timeline.date 值的变化,当它确实发生变化时,我们切换 flag 变量,从而产生颜色变化。
The TimelineView will first appear. Two seconds later, the timeline will update (e.g., due to the first scheduler update), triggering the onChange closure. This will in turn change the flag variable. Now, since our TimelineView has a dependency on it, it will need to refresh immediately, triggering another toggle of the flag variable, forcing another TimelineView refresh, and so on, and so on… You got it: multiple updates per frame. TimelineView 将首先出现。两秒钟后,时间线将更新(例如,由于第一次调度程序更新),触发 onChange 关闭。这反过来又会改变变量 flag 。现在,由于 our TimelineView 依赖于它,它需要立即刷新,触发 flag 变量的另一次切换,强制另一次 TimelineView 刷新,依此类推......你明白了:每帧多次更新。
So how do we fix it? Solutions may vary. In this case, we simply encapsulate the contents and move the flag variable inside the encapsulated view. Now the TimelineView no longer depends on it:
那么我们如何解决它呢?解决方案可能有所不同。在这种情况下,我们只需封装内容并将 flag 变量移动到封装的视图中。现在不再 TimelineView 依赖于它:
struct ExampleView: View {
    var body: some View {

        TimelineView(.periodic(from: .now, by: 1.0)) { timeline in
            SubView(date: timeline.date)
        }

    }
}

struct SubView: View {
    @State private var flag = false
    let date: Date

    var body: some View {
        Text("Hello")
            .foregroundStyle(flag ? .red : .blue)
            .onChange(of: date) { (date: Date) in
                flag.toggle()
            }
    }
}
Exploring New Ideas 探索新想法
Refreshing Once Per Timeline Update: As mentioned before, this pattern makes our views to compute their bodies twice per update: first when the timeline updates, and then again when we advance our animation state values. In this type of animation where we have spaced key points in time, that is perfectly fine.
每次时间线更新刷新一次:如前所述,此模式使我们的视图在每次更新时计算其主体两次:第一次是在时间轴更新时,第二次是在我们推进动画状态值时。在这种类型的动画中,我们在时间点上间隔了关键点,这完全没问题。
In animations where those points in time are too close together maybe you need/want to avoid that. If you need to change a stored value, but avoid a view refresh… there’s a trick you can do. Instead of @State, use @StateObject. Make sure you DO NOT make such value @Published. If at some point, you want/need to tell your view to refresh, you can always call objectWillChange.send()
在这些时间点靠得太近的动画中,也许您需要/想要避免这种情况。如果需要更改存储的值,但避免刷新视图...你可以做一个技巧。代替 @State ,请使用 @StateObject 。确保你不要做这样的值 @Published 。如果在某个时候,你想要/需要告诉你的视图刷新,你可以随时调用 objectWillChange.send()
Matching Animation Duration and Offsets:In the keyframe example, we use different animations for each of the animation segments. To do so, we store the Animation values in our array. If you look closer, you’ll see that in our specific example, the offsets and the animation durations match! It makes sense, right? So instead of having the Animation value in your array, you may define an enum with the kind of animations. Later in your view, you create
the Animation value, based on the animation kind, but instantiate it with the duration from the offset value. Something like this:
匹配动画持续时间和偏移量:在关键帧示例中,我们为每个动画片段使用不同的动画。为此,我们将 Animation 值存储在数组中。如果你仔细观察,你会发现在我们的特定示例中,偏移量和动画持续时间是匹配的!这是有道理的,对吧?因此,您可以在数组中定义一个具有动画类型的枚举,而不是在数组中使用 Animation 值。稍后在视图中,您将根据动画类型创建 Animation 值,但使用偏移值中的持续时间对其进行实例化。像这样的东西:
enum KeyFrameAnimation {
    case none
    case linear
    case easeOut
    case easeIn
}

struct KeyFrame {
    let offset: TimeInterval
    let rotation: Double
    let yScale: Double
    let y: CGFloat
    let animationKind: KeyFrameAnimation

    var animation: Animation? {
        switch animationKind {
        case .none: return nil
        case .linear: return .linear(duration: offset)
        case .easeIn: return .easeIn(duration: offset)
        case .easeOut: return .easeOut(duration: offset)
        }
    }
}

let keyframes = [
    // Initial state, will be used once. Its offset is useless and will be ignored
    KeyFrame(offset: 0.0, rotation: 0, yScale: 1.0, y: 0, animationKind: .none),

    // Animation keyframes
    KeyFrame(offset: 0.2, rotation:   0, yScale: 0.5, y:  20, animationKind: .linear),
    KeyFrame(offset: 0.4, rotation:   0, yScale: 1.0, y: -20, animationKind: .linear),
    KeyFrame(offset: 0.5, rotation: 360, yScale: 1.0, y: -80, animationKind: .easeOut),
    KeyFrame(offset: 0.4, rotation: 360, yScale: 1.0, y: -20, animationKind: .easeIn),
    KeyFrame(offset: 0.2, rotation: 360, yScale: 0.5, y:  20, animationKind: .easeOut),
    KeyFrame(offset: 0.4, rotation: 360, yScale: 1.0, y: -20, animationKind: .linear),
    KeyFrame(offset: 0.5, rotation:   0, yScale: 1.0, y: -80, animationKind: .easeOut),
    KeyFrame(offset: 0.4, rotation:   0, yScale: 1.0, y: -20, animationKind: .easeIn),
]
If you wonder why I didn’t do it like this in the first place, I just wanted to show you that both ways are possible. The first case is more flexible, but more verbose. That is, we are forced to specify the duration for each animation, however, it is more flexible, because we are free to use a duration that does not match the offset.
如果你想知道为什么我一开始没有这样做,我只是想告诉你这两种方式都是可能的。第一种情况更灵活,但更冗长。也就是说,我们被迫指定每个动画的持续时间,但是,它更灵活,因为我们可以自由使用与偏移量不匹配的持续时间。
When using this new approach, however, you could easily add a customizable factor, that could let you slow down or speed up the animation, without having to touch the keyframes at all.
但是,在使用这种新方法时,您可以轻松添加可自定义的因素,从而减慢或加快动画速度,而无需触摸关键帧。
Nesting TimelineViews: Nothing prevents you from nesting one TimelineView inside another. Now that we have our JumpingEmoji, we can put three JumpingEmoji views inside a TimelineView that makes them appeared one at a time with a delay:
嵌套 TimelineViews:没有什么能阻止您将一个 TimelineView 嵌套在另一个中。现在我们有了 JumpingEmoji,我们可以在 a TimelineView 中放置三个 JumpingEmoji 视图,使它们一次出现一个,但有延迟:
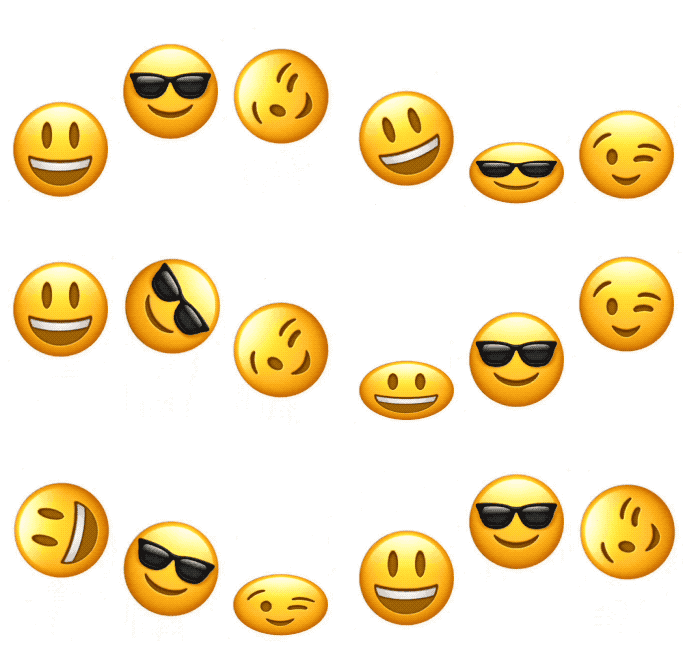
For the full code of the emoji wave, check out this gist.
有关表情符号波的完整代码,请查看此要点。
GifImage Example GifImage 示例
I originally had one more example, but it got scrapped when I published the article. The reason it didn’t made the cut, is because the concurrency API was not yet stable. Fortunately, it is now safe to publish it. The code uses TimelineView to implement a view for animated gifs. The view loads the gif asynchronously from a URL (which can be both local or remote). All the code is available in this gist.
我本来还有一个例子,但当我发表这篇文章时,它被废弃了。它之所以没有成功,是因为并发 API 还不稳定。幸运的是,现在可以安全地发布它了。该代码使用 TimelineView 实现动画 gif 的视图。该视图从 URL(可以是本地或远程)异步加载 gif。所有代码都在此要点中提供。
Summary 总结
Congratulations for reaching the end of this long post. It was a ride! We went from the simplest TimelineView example, to some creative uses of the view. In part 5, I will explore the new Canvas view, and how well it combines with TimelineView. By putting them both together, we will extend even more what is possible in the world of SwiftUI animations.
恭喜你到达了这篇长文的结尾。这是一次骑行!我们从最 TimelineView 简单的例子,到视图的一些创造性使用。在第 5 部分中,我将探讨新 Canvas 视图,以及它与 TimelineView .通过将它们放在一起,我们将进一步扩展 SwiftUI 动画世界的可能性。